Create New Event and Book Rooms from New Outlook Client
Step 1: Create a new Event
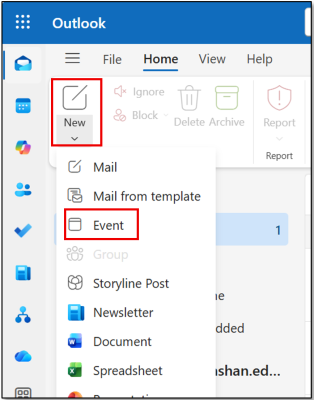
From Outlook client home page, go to “New” and click “Event” to create a new event or appointment:
Step 2: Input necessary information of Event details
2.1 Input basic information of Event details including:
- Event title
- Required attendees
- Scheduled time
- Room or location
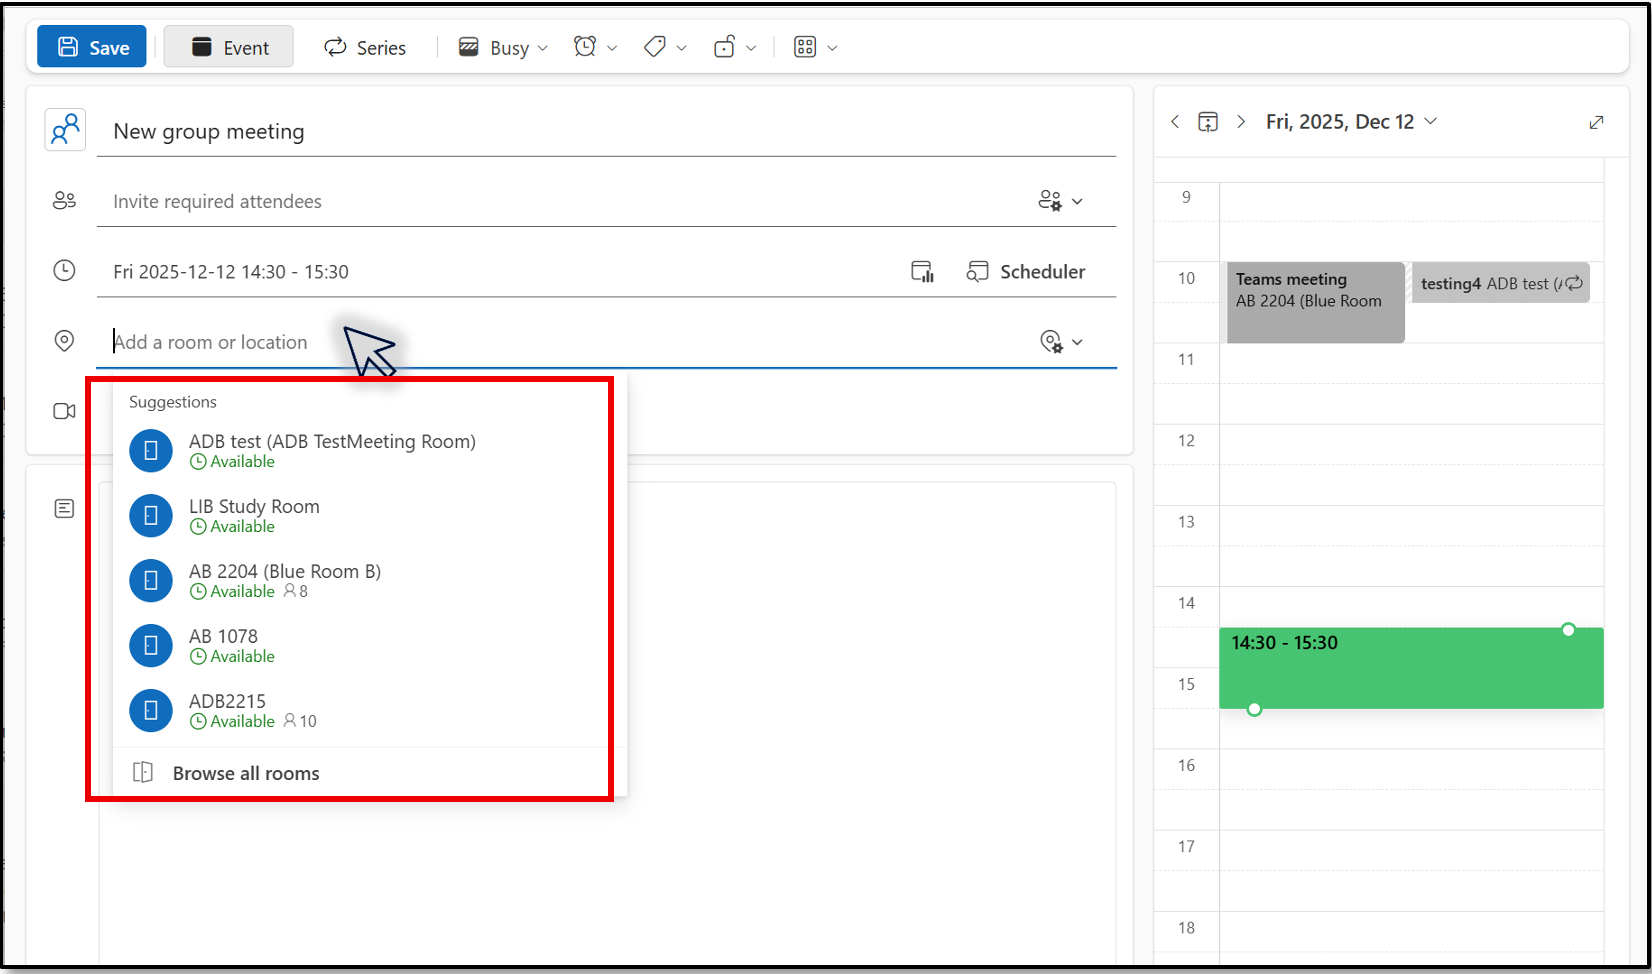
2.2 When clicking Add a room or location option, a suggested room list will show up automatically:
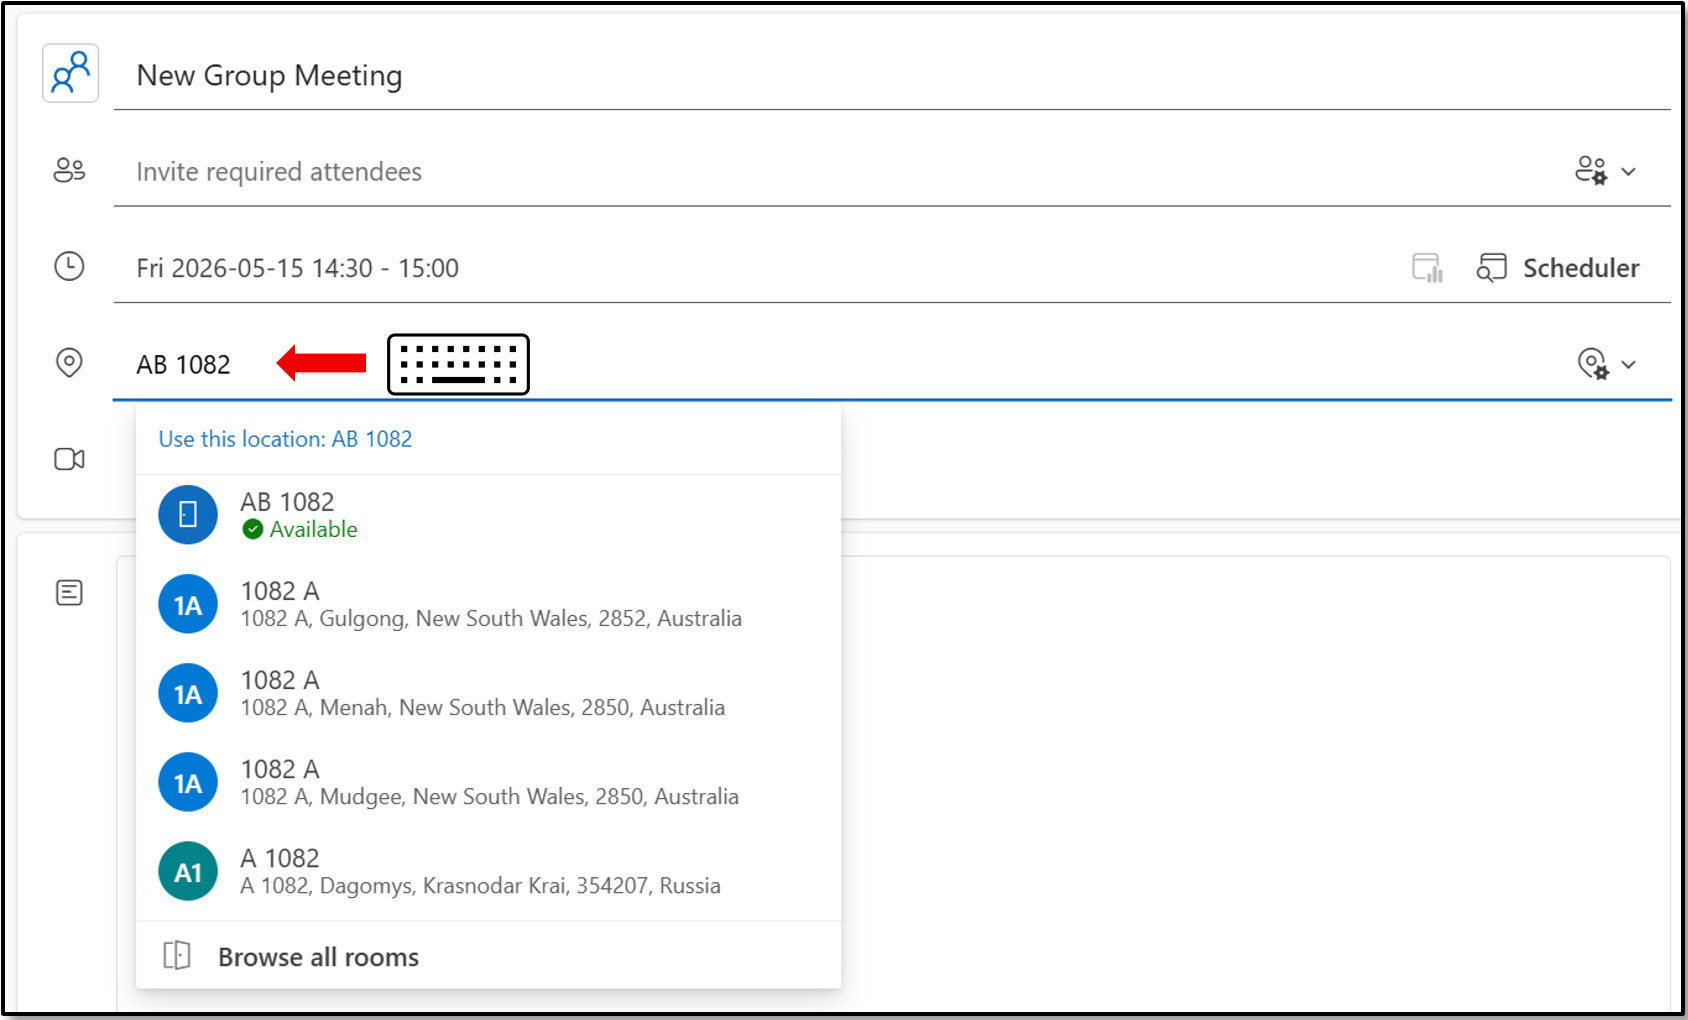
2.3 If your favorite room is shown in the list, please just click the room name to choose it; you can also input the room name to search for it:
Step 3: Send meeting invitation and confirmation from meeting room
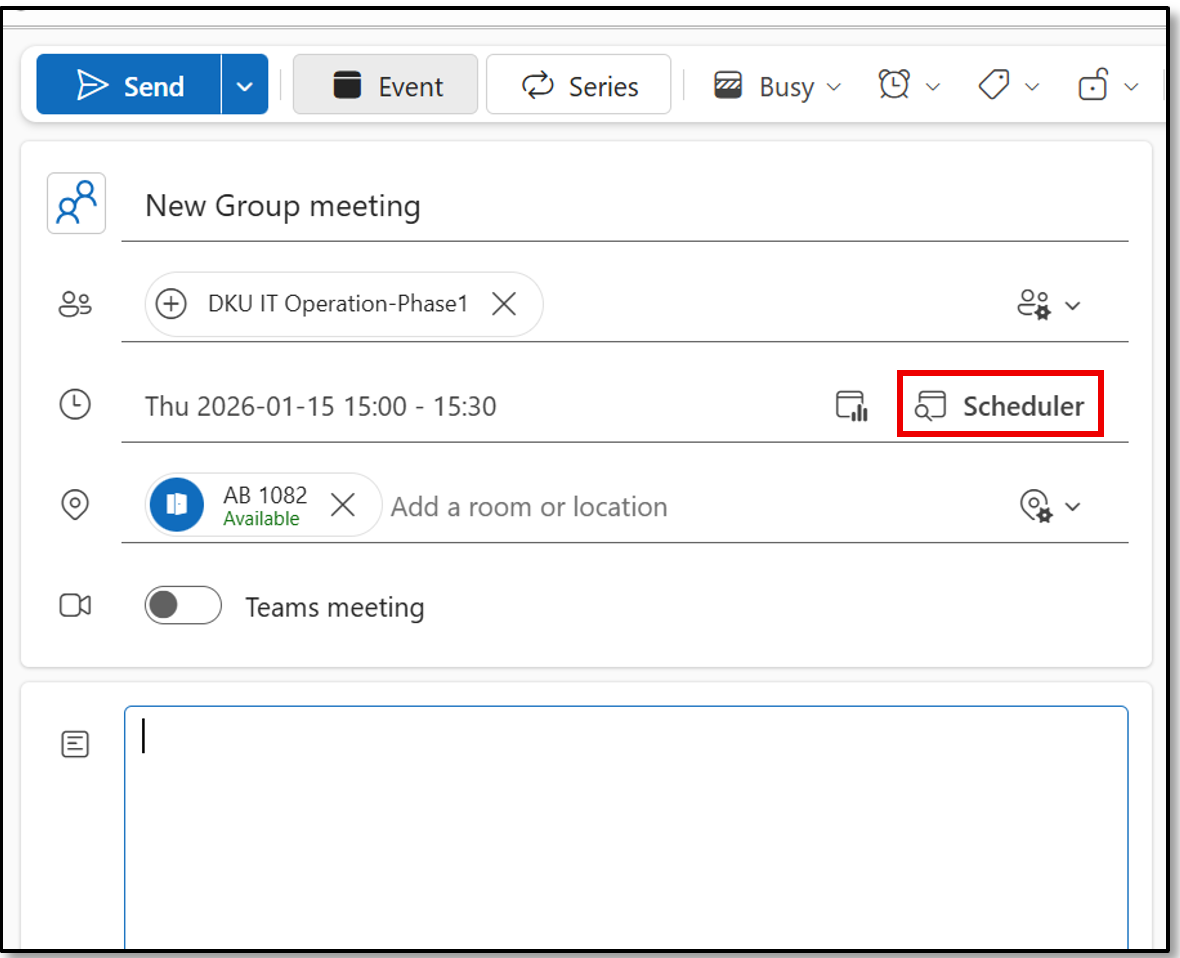
3.1 After room name displayed, you could see whether it is available or busy, click the available room to select it and click “Send” button to send invitation.
Tips: You could click Scheduler button to confirm if there’s any conflict between attendees or meeting room, then change it to a proper time or location:
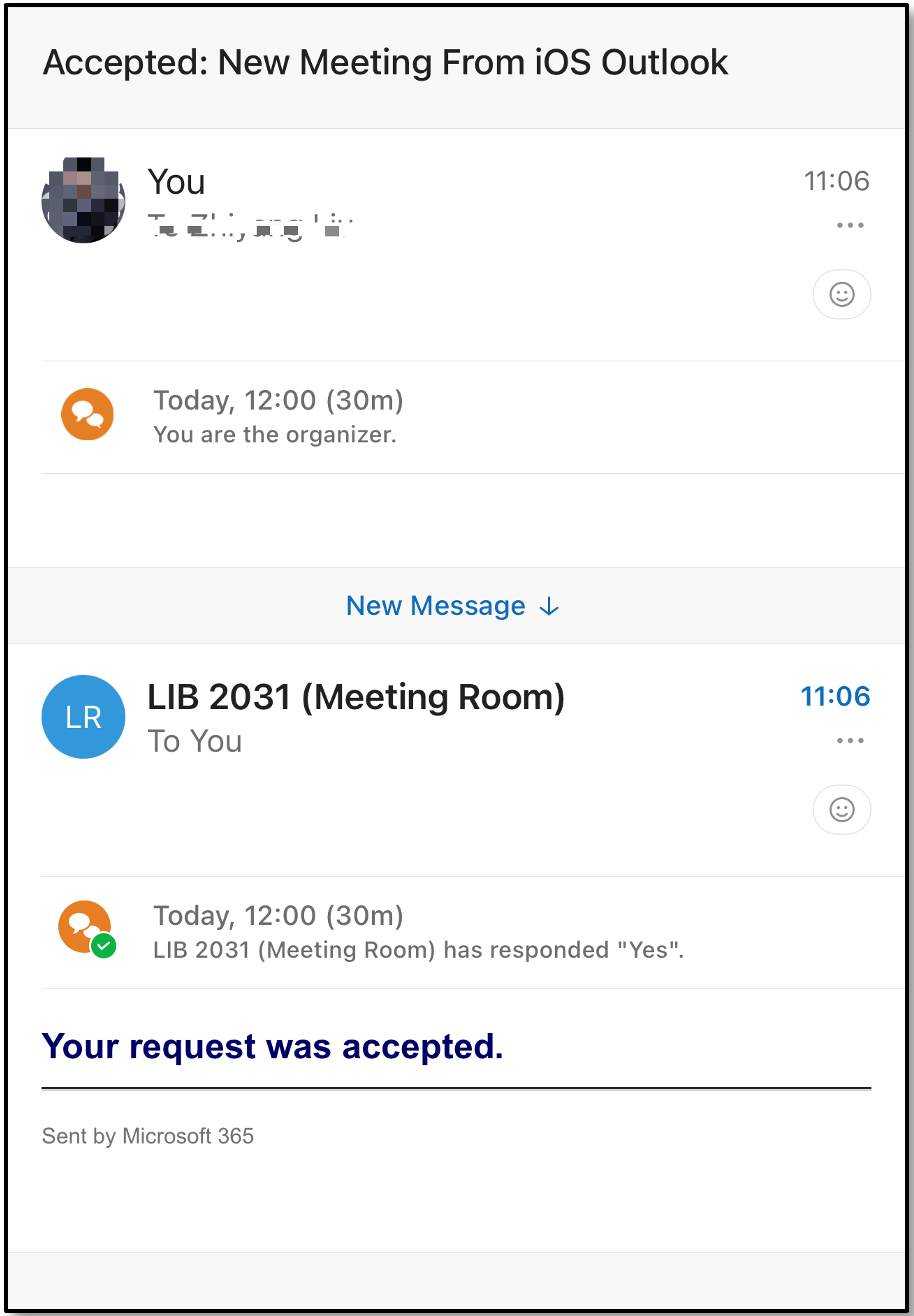
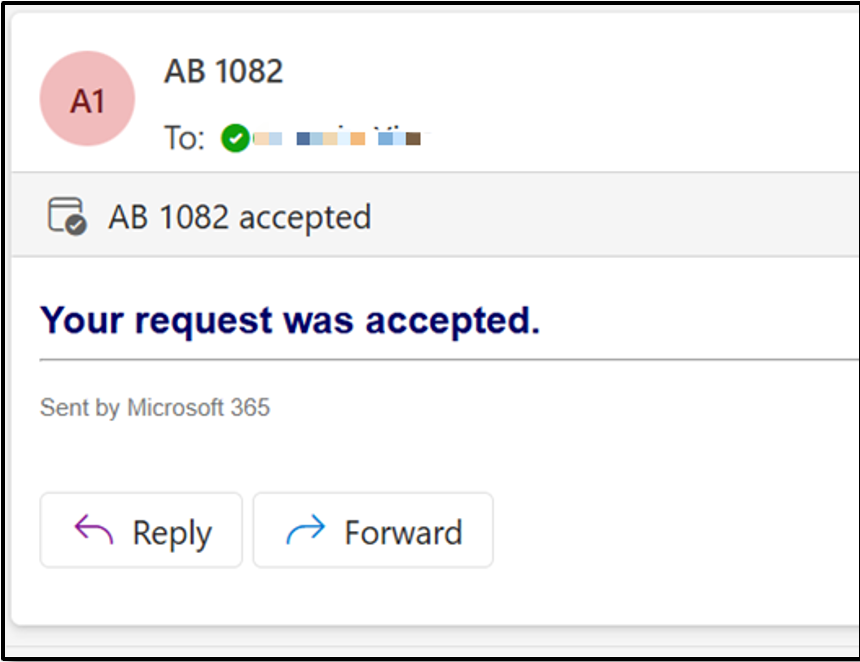
3.2 After a little while you will get a confirmation email from meeting room that your booking has been accepted:
Create New Event and Book Rooms from Classic Outlook Client
Step1: Create a new Meeting
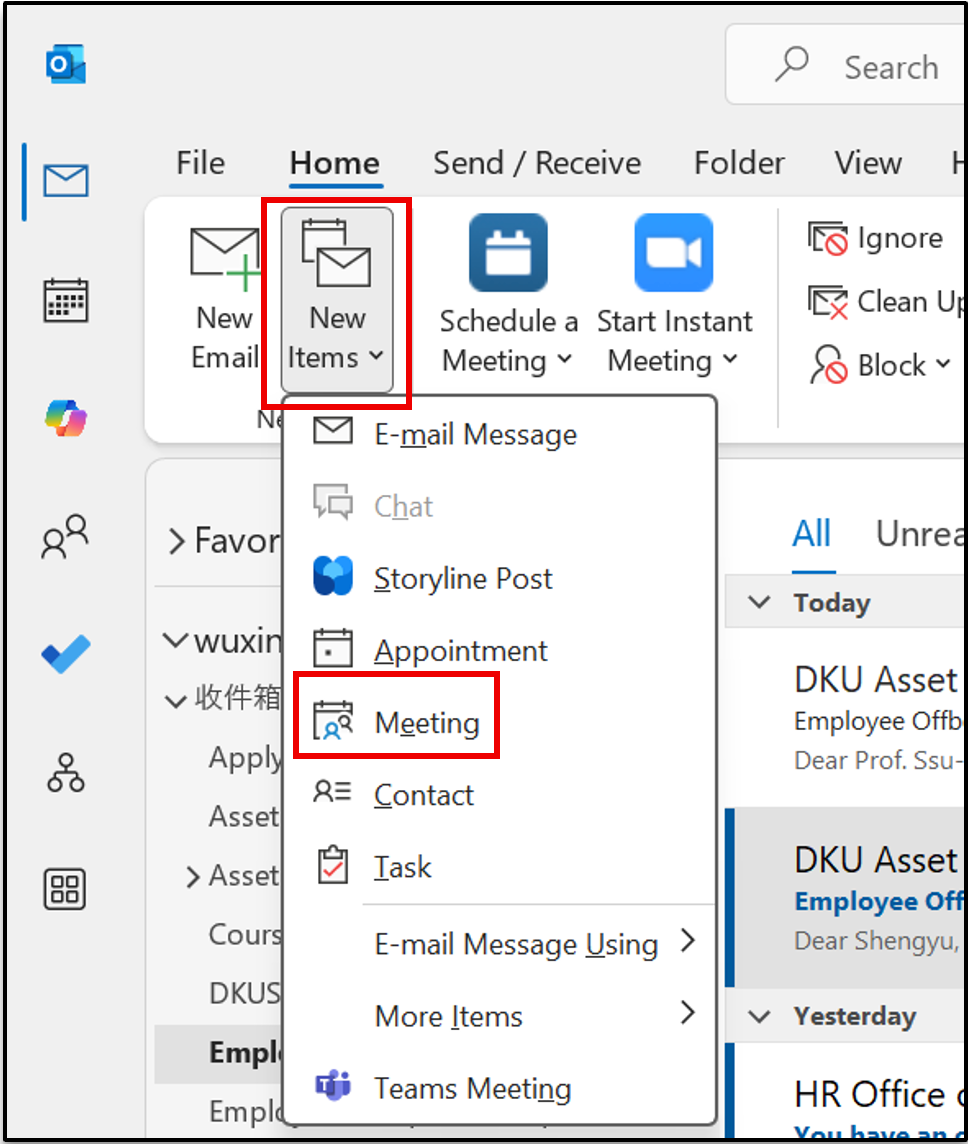
From Outlook client home page, go to “New Items” and click “Meeting” to create a new meeting:
Step 2: Input necessary information of Meeting details
2.1 Input basic information of Meeting details including:
- Meeting title
- Required attendees
- Scheduled time
- Room or location
2.2 When clicking Location option, a suggested room list will show up automatically as below:
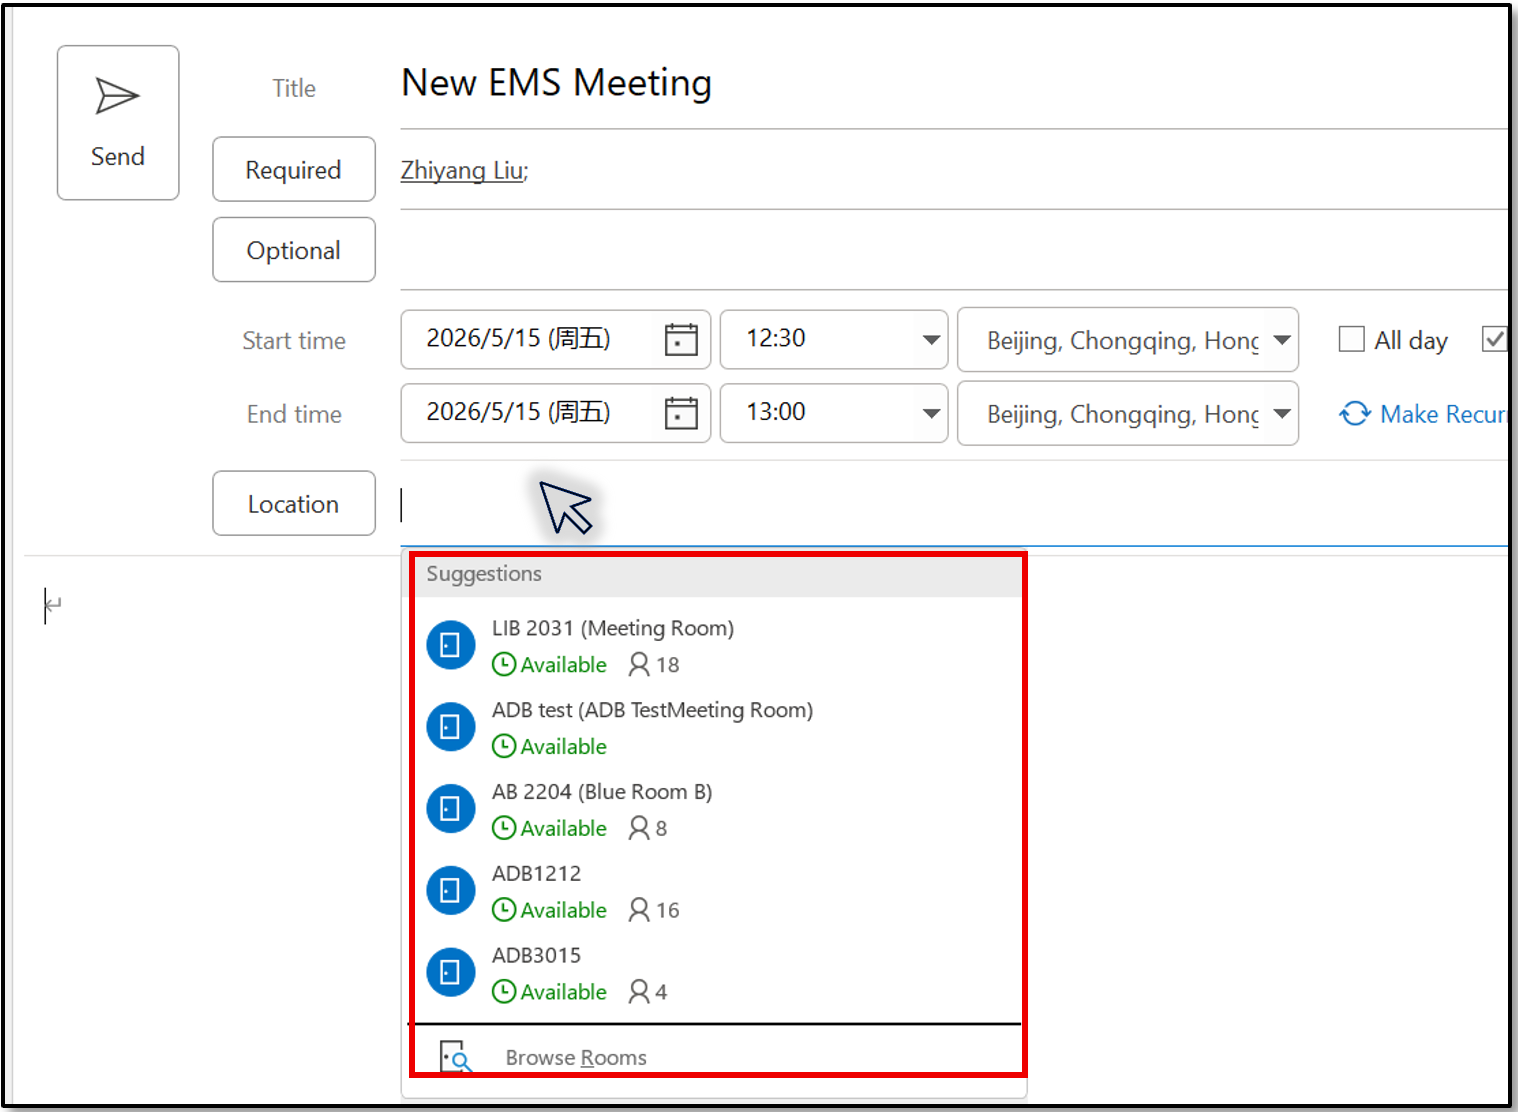
2.3 If your favorite room is shown in the list, please just click the room name to choose it, you can also input the room name to search for it:

Step 3: Send meeting invitation and confirmation from meeting room
3.1 After room name displayed, you could see whether it is available or busy, click the available room to select it and click “Send” button to send invitation.
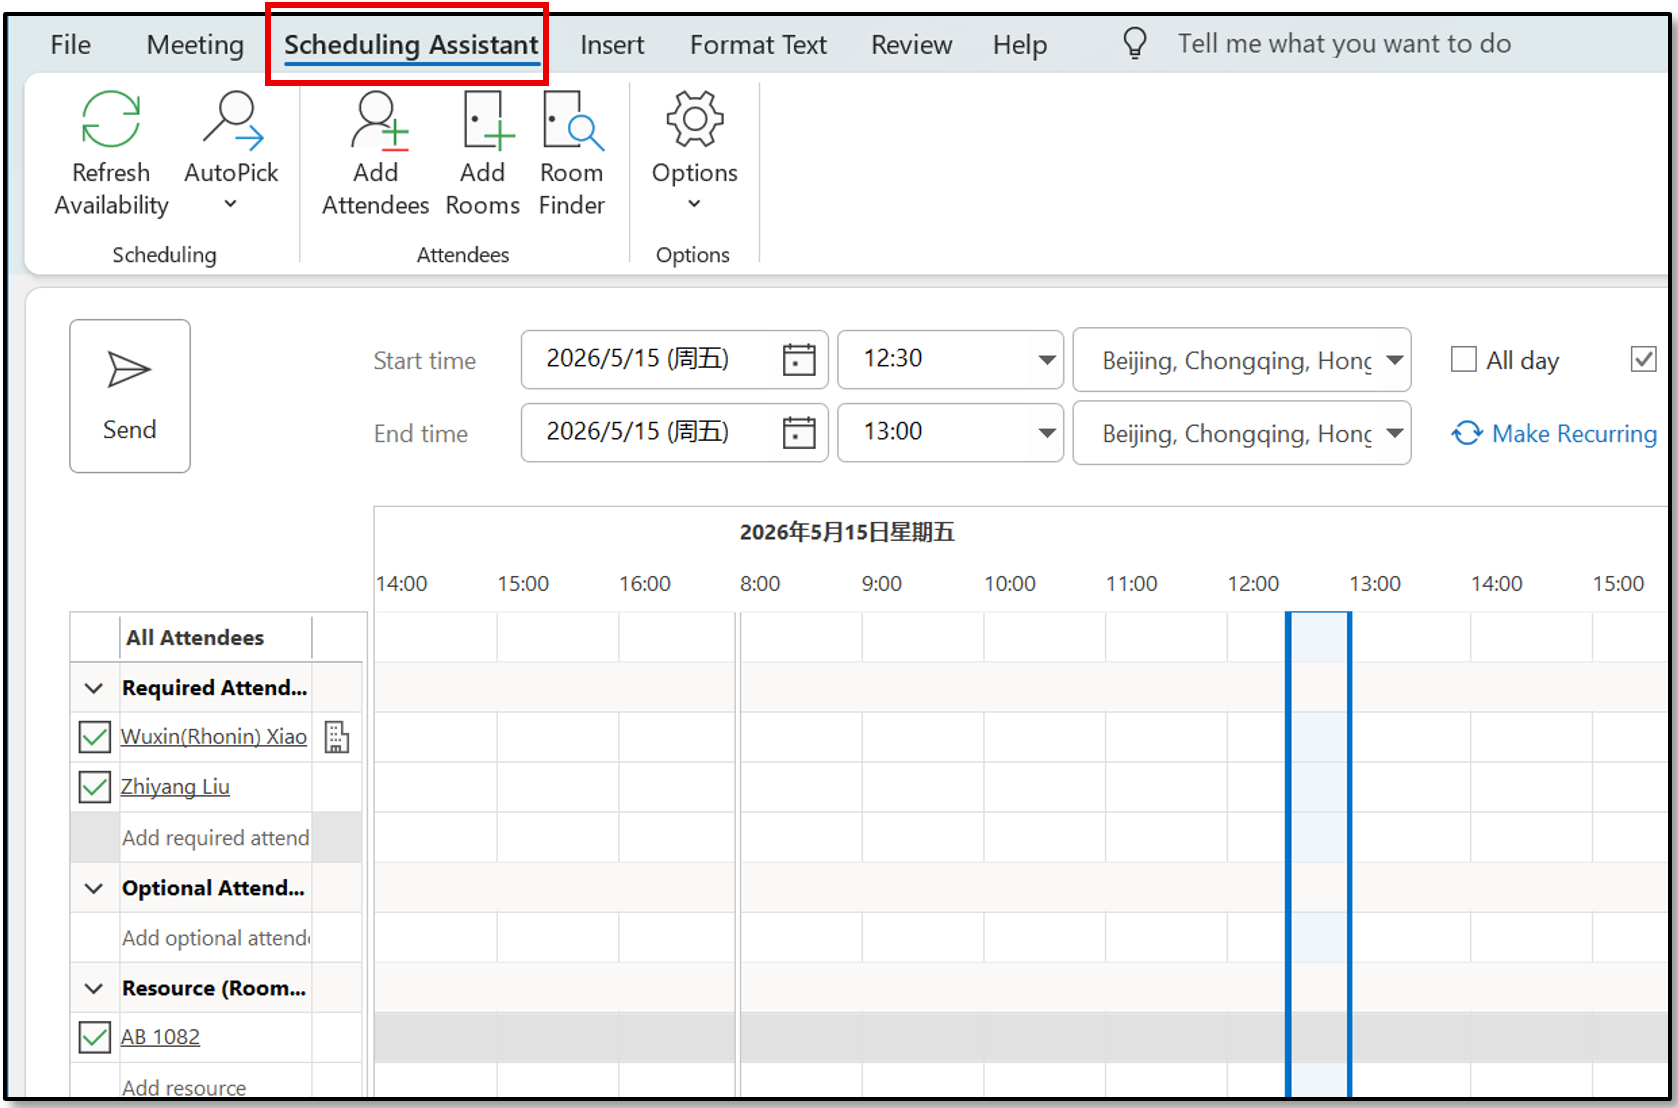
Tips: You could click Scheduling Assistant button to confirm if there’s any conflict between attendees or meeting room, then change it to a proper time or location:
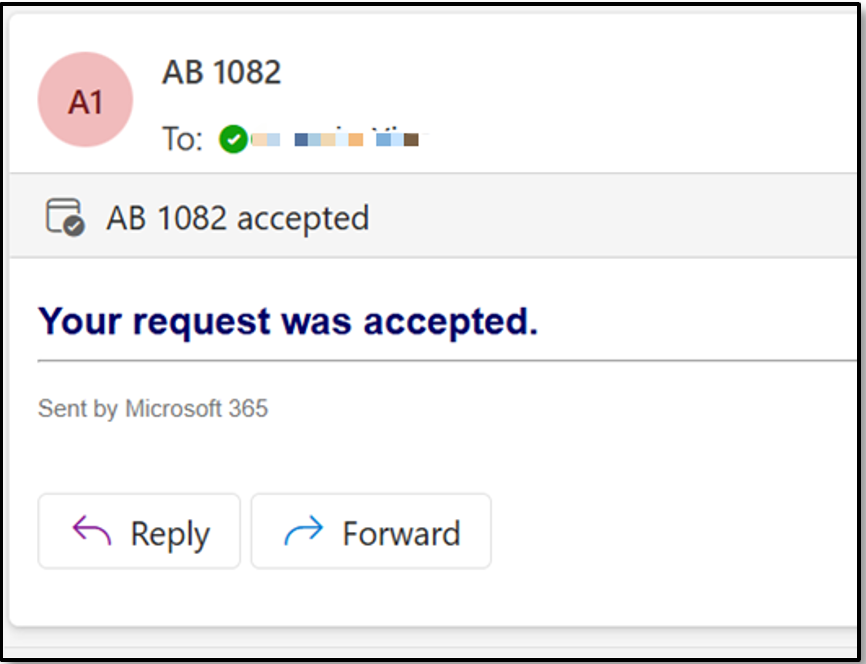
3.2 After a little while you will get a confirmation email from meeting room that your booking has been accepted:
Create New Event and Book Rooms from Mobile Outlook Client
Notes: You could quickly start a meeting and book a meeting room from your mobile Outlook client.
1. Open Outlook APP, and tap Calendar icon, you could see “Create Event” button at the lower right corner.
2. Click icon to create a new event, including necessary meeting information.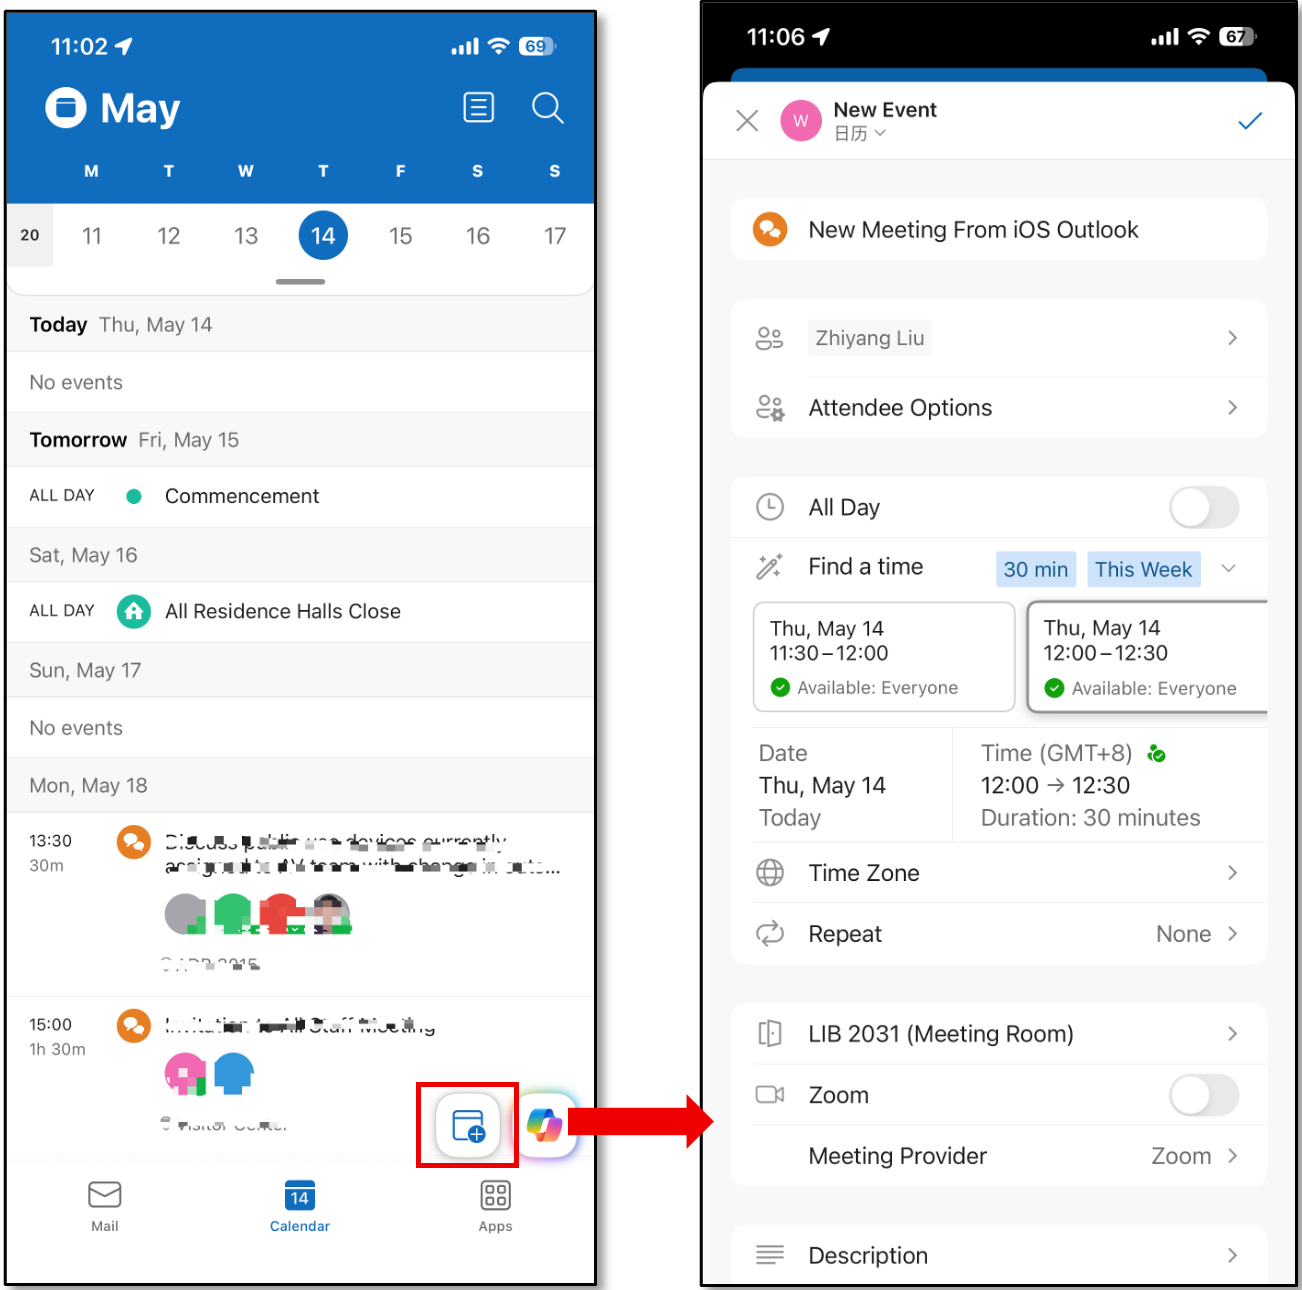
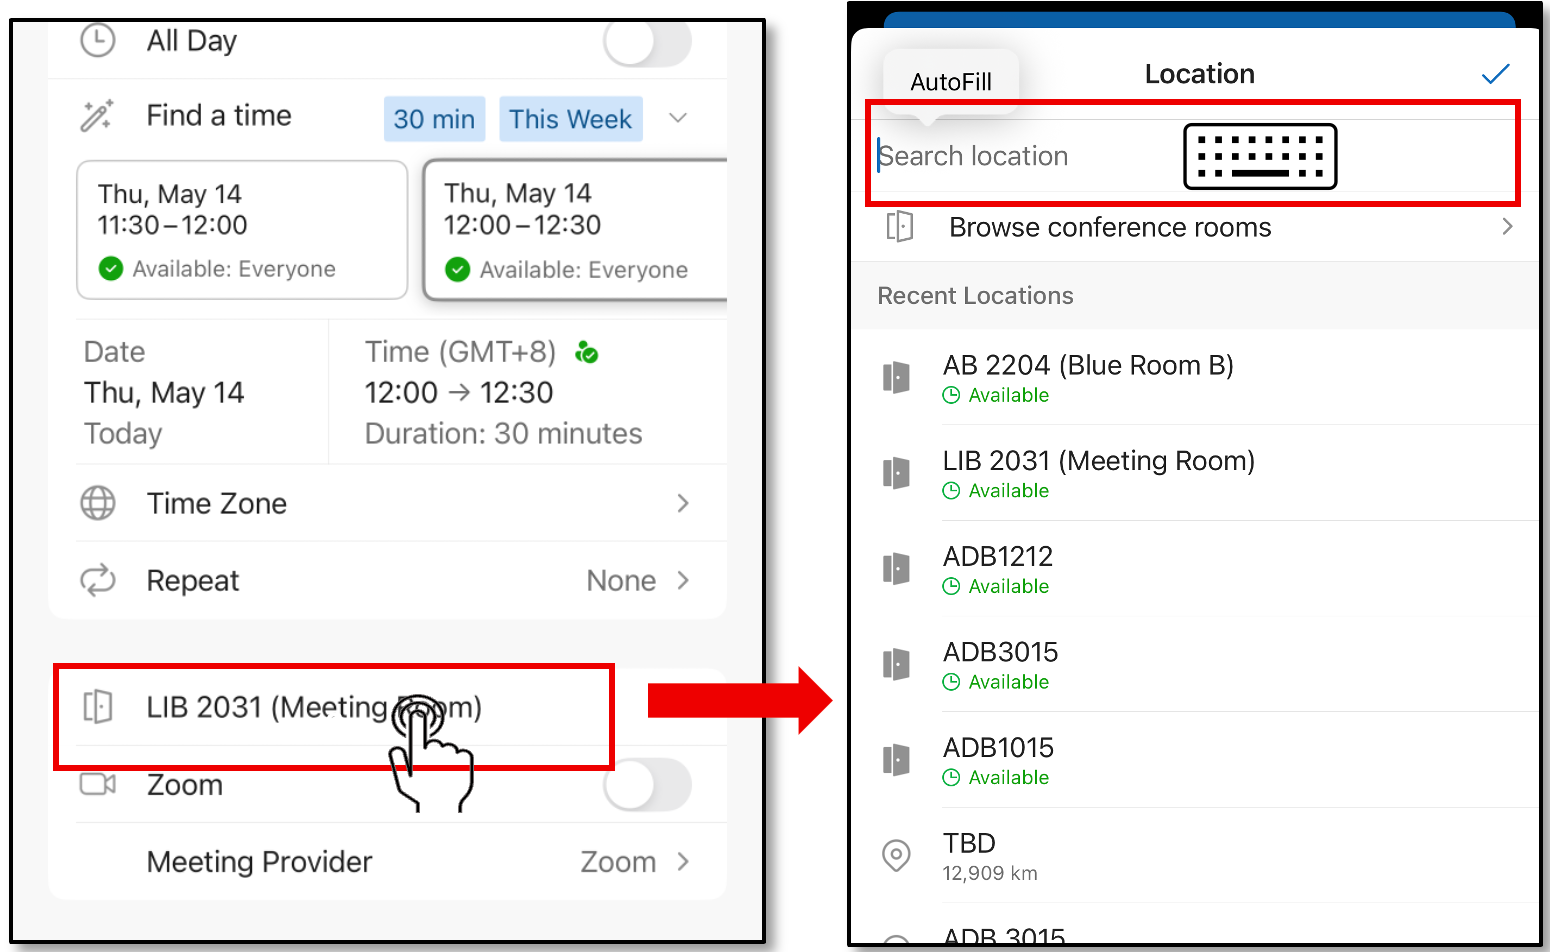
3. From the location option, a recent room list will show up automatically, you could choose your favorite room, or enter the room name to find it:
4. After each setting confirmed, click the ✔️ icon to send the invitation.
5. You will get a confirmation email from meeting room that your booking request has been accepted: