Your NetID
A Duke NetID is your unique username and password for a variety of computing resources (workstation login, Duke@Work, etc.) at Duke.
As a new student, you will receive your NetID via email, along with an activation link to set your initial password.
As a new employee, you will receive a NetID and instructions for resetting your NetID password during your IT onboarding.
Please make sure that you had already activated your NetID and changed your password successfully before you on campus.
You can change your NetID password and your settings using the Account Self-Service tool.
How to connect DKU Wi-Fi
DKU provides an on-campus wireless network named “DKU”, which is accessible via mobile phones and laptops. To connect, simply select the “DKU” network and enter the password. For detailed instructions, please refer to Step 1 below.
To access the DKU wireless network, you will need to register your computer and other devices to use the DKU wireless network. Please follow step2 below:
STEP 1 Connect DKU Wi-Fi
Connect to the DKU wireless network

Password: Ask a DKU staff member for the password or call IT Service Desk (+86) 0512-3665-7100
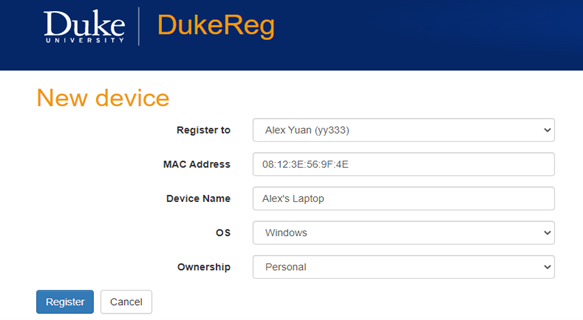
STEP 2 Register your device
Next, you will go to register page for your device in the screenshot below, if you aren’t automatically taken to the page, open your web browser and go to DukeReg to proceed with the registration.
DKU Wi-Fi Video Instruction click HERE.
You can read more information about DKU Wi-Fi and Proxy HERE.
How to set the Proxy correctly
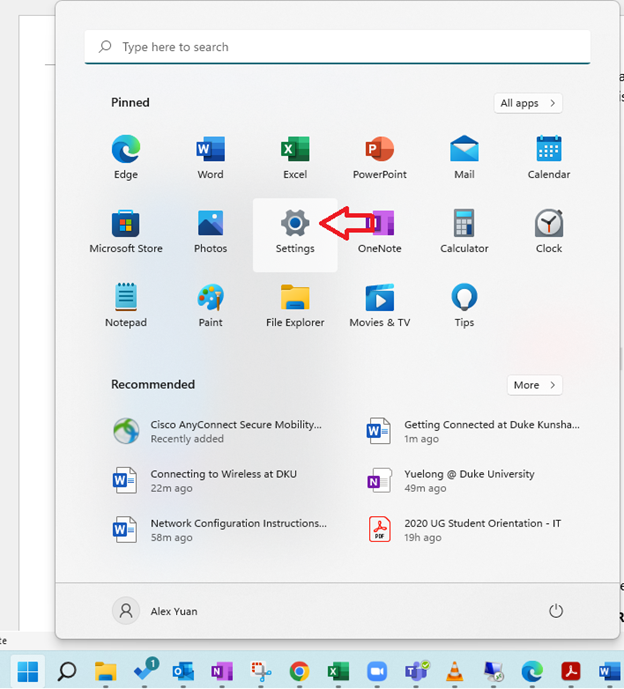
A. Proxy setting Instruction – Windows
1. Click the Start Button and go to “Settings”
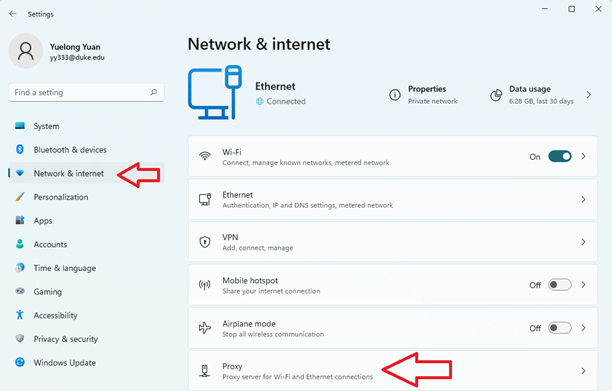
2.Click on “Network and Internet” and choose Proxy
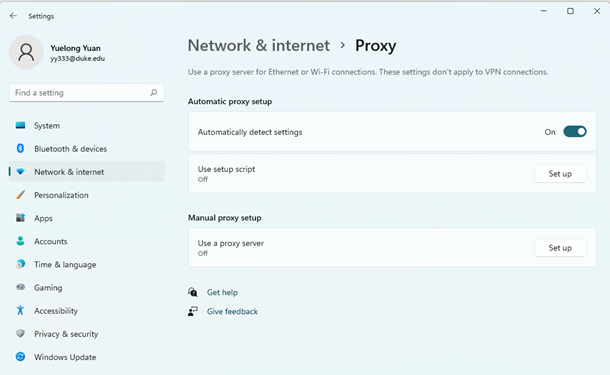
3.Turn on “Automatically detect settings”
B. Proxy setting Instruction – MacOS
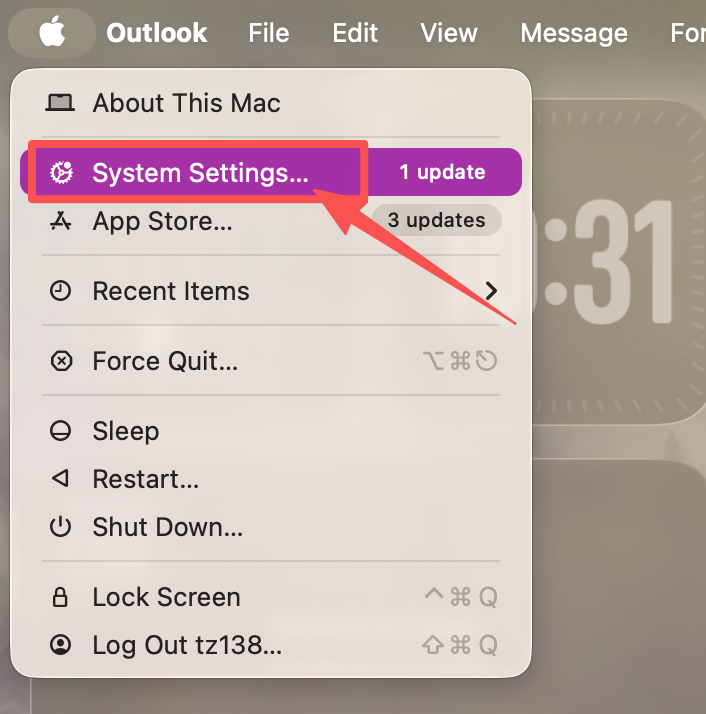
1.Open the Apple menu and select “System Settings”.
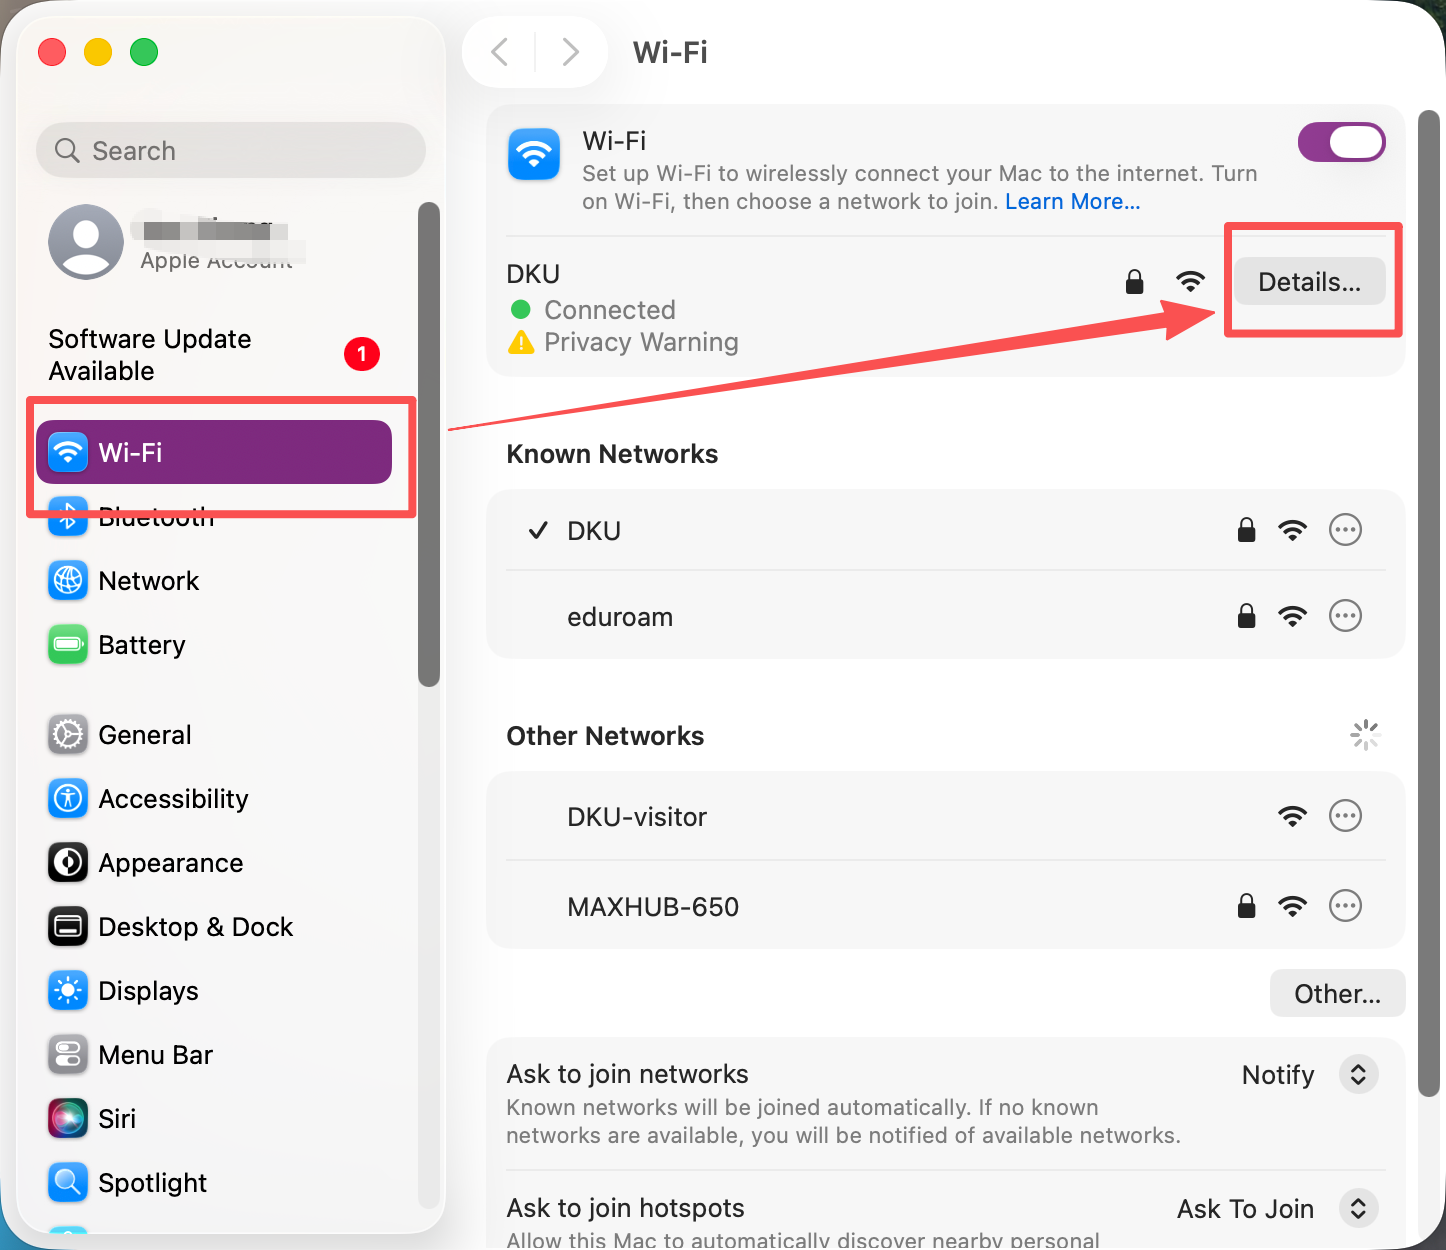
2. In “System Settings” window, select “Wi-Fi”, then click on “Details”.
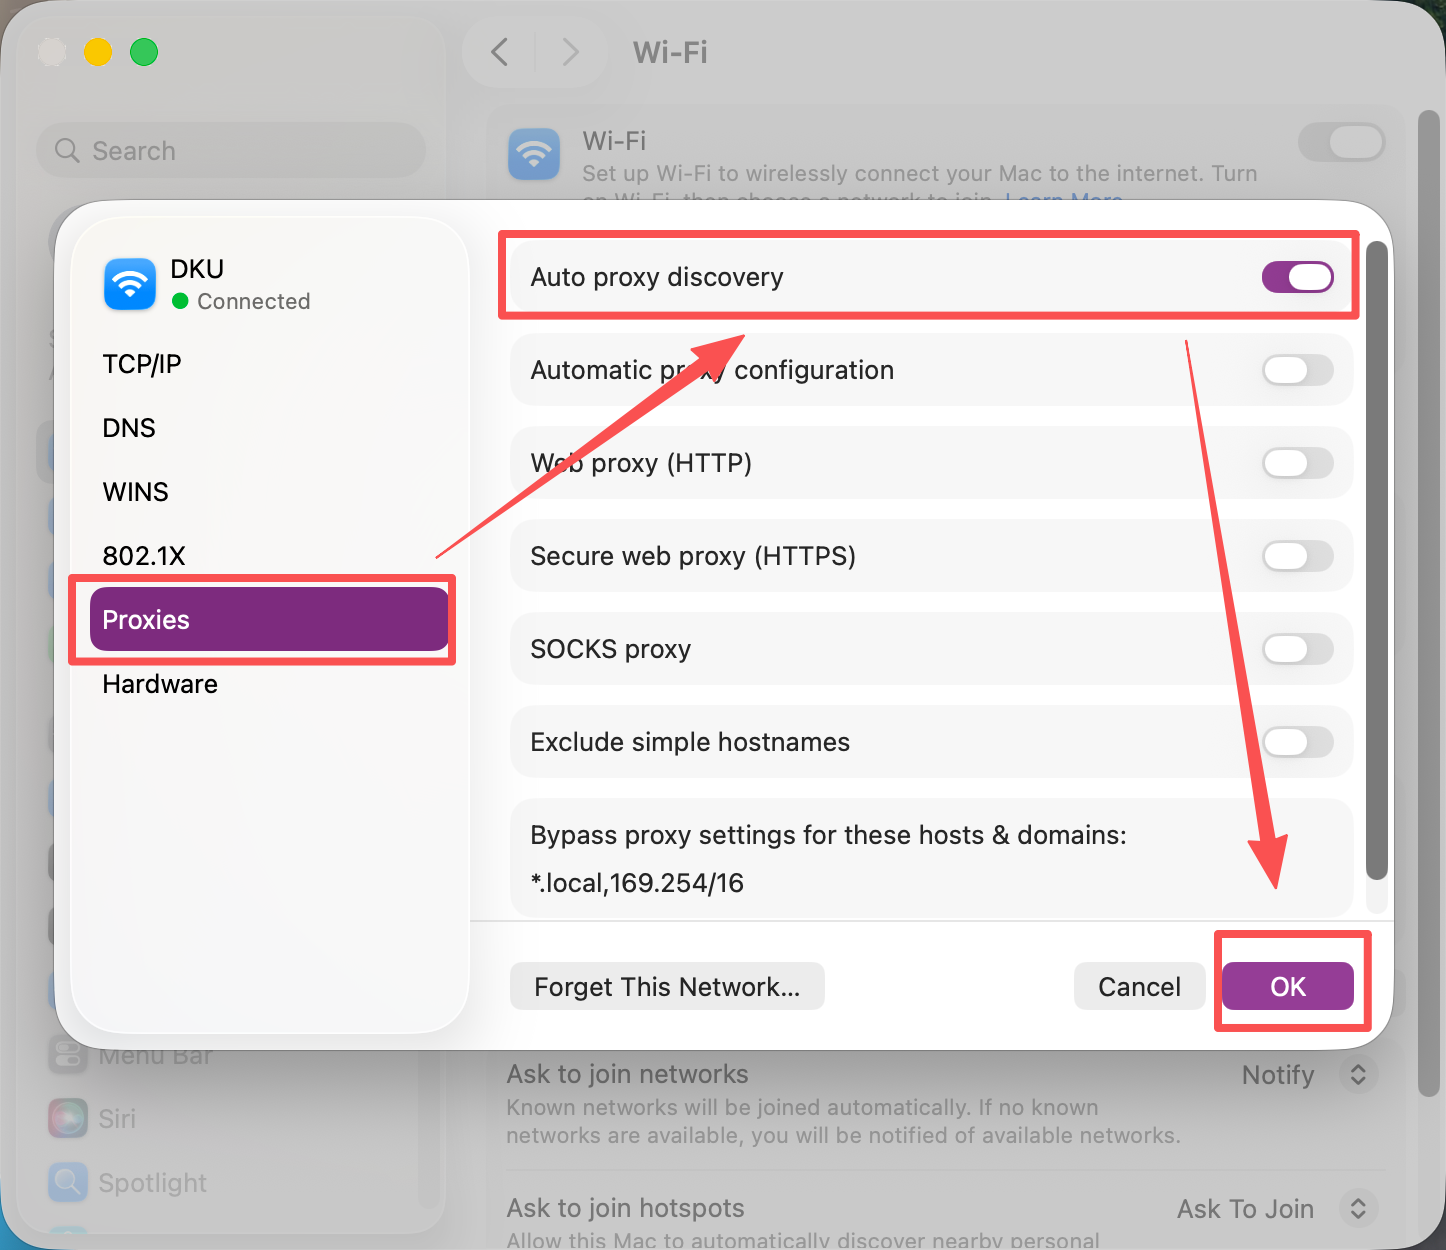
3. Click on the tab labeled “Proxies” and enable “Auto Proxy Discovery” box. Click OK to apply this to complete the setup.
Multi-Factor Authentication
Protect your Duke accounts using Multi-factor Authentication (MFA). MFA requires authentication with a phone or passcode. MFA is required to access most Duke services (VPN, Network Attached Storage, Duke@Work, etc.)
For further information and instructions on how to sign up to MFA, please click HERE.
MFA Video Instruction click HERE.
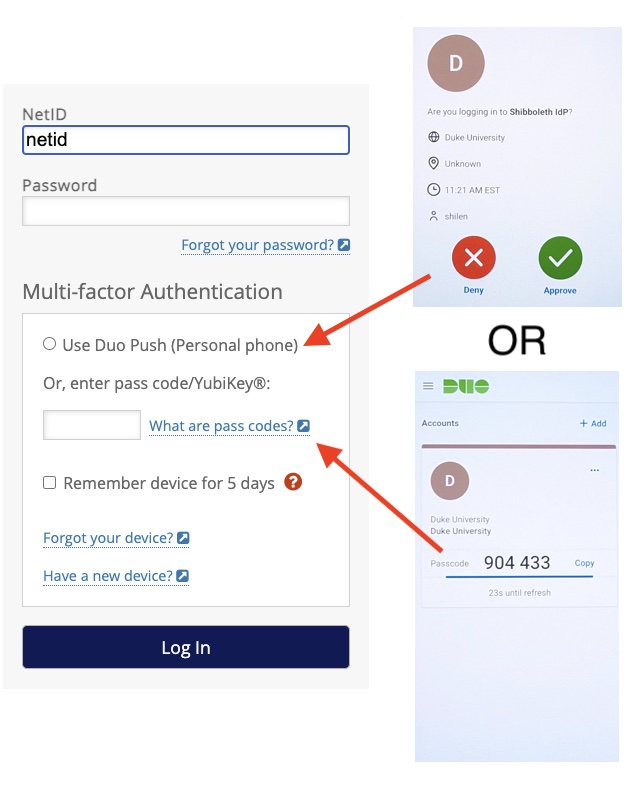
NetID login page
You will be prompted to log in with your NetID, password and new second factor.
Zoom
Zoom conferencing platform is now available to all DKU faculty, students and staff!
This tool will offer great support in remote teaching/learning, conferencing, and collaboration, especially during this period of difficult time of fighting coronavirus.
1. Download & Installation
You can click HERE to download the latest version of Zoom client.
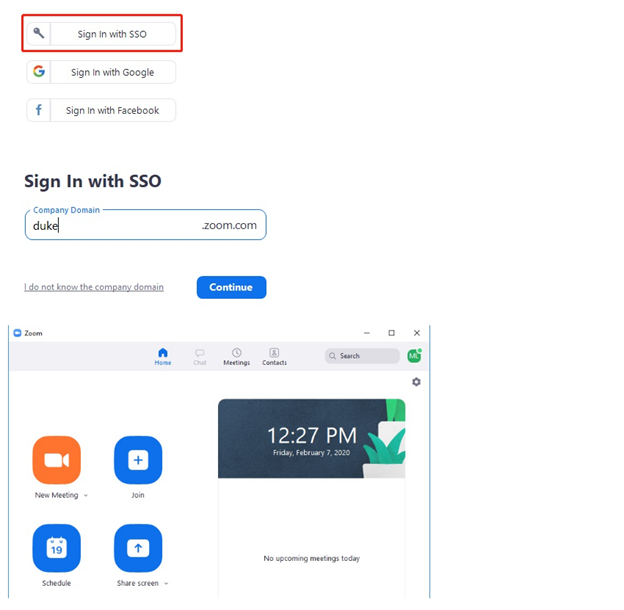
2.How to log in my account?
To log in using the client, select ‘Sign in with SSO’. It will later jump to the Duke Login page. After you finish SSO, zoom client will get logged in.
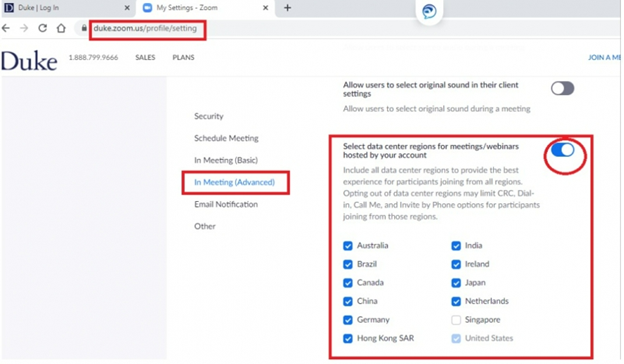
3.How to enable the China data center of Zoom
Turn on “Data Center regions” to check the country where you are located. For example: If you are located in China, please check “China” box as the US box is checked by default.
4. You can read more information about Zoom HERE.
ePrint
1.Download & Installation
(1) Windows users click here: ePrint Install for PCs
(2) Mac users click here: ePrint Install for Macs
Important Note 1: You may need to disable your local antivirus software (like 360, Norton, etc.) if you can’t get the pop window from Pharos.
Important Note 2: Print in Black and White, this will save you money! Only print in color when required.
2.How to use ePrint
(1) Print from your PC or Mac and select one of these ePrinters:
- ePrint-Ricoh-BW
- ePrint-Ricoh-Color
- ePrint-Lexmark-BW
(2) It will request your NetID:

(3) Go to an ePrinter (a Ricoh or a Lexmark, depending on which one you selected)
(4) Swipe your ID card on the Card Scanner. (It will beep.)
(5) Select “Print All” (or select the documents you wish to print).
3. Click HERE and watch ePrint video instruction.
4. If you want to read more information about ePrint, click HERE.
Cisco AnyConnect – VPN
1.Download & Installation
(1) Windows users click here: VPN Install for PCs
(2) Mac users click here: VPN Install for Mac
(3) Enter your NetID and password and complete the MFA authentication.
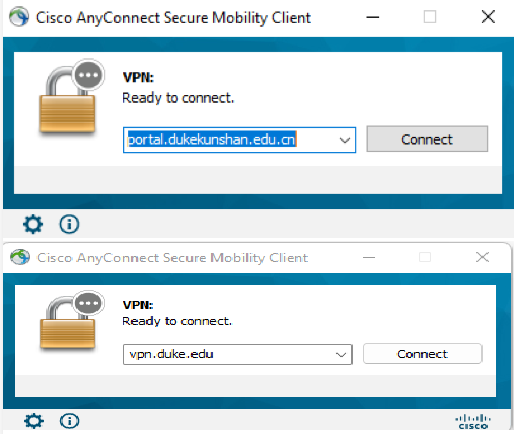
2.How to connect to DKU or Duke VPN
(1) Input DKU VPN address: “portal.dukekunshan.edu.cn” or Duke VPN address: “vpn.duke.edu”
(2) Please choose a group and input your NetID and password, and then click OK.
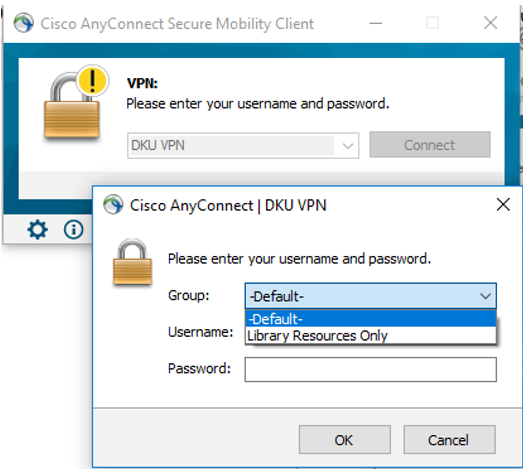
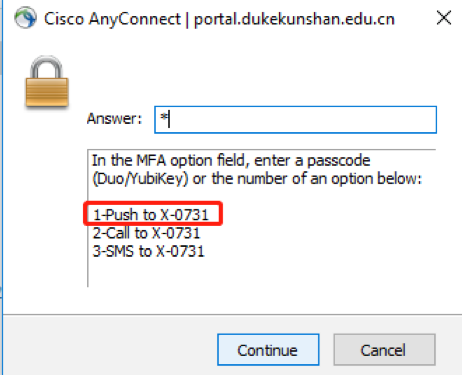
(3) MFA authentication. You may enter “1” and click “Continue”, then open DUO application on your registered smartphone and tap “Approve”. Starting from 21st Nov. 2024, Call and SMS will not be available, please choose only PUSH to your mobile devices.
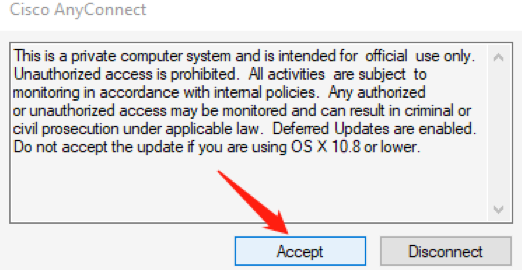
(4) A message box will pop up, click Accept, now your computer should connect to DKU VPN!
3. Click HERE to watch Cisco Anyconnect VPN tutorial video.
4. If you want to read more information about Cisco AnyConnect VPN, click HERE.